Friday, February 10, 2012

Panoramic view of London


Panoramic view of London

Photographer Will Pearson has taken shots from the top of the almost-completed Shard in London. The building is 1,017ft tall and some of the photos has been taken from above the cLinklouds. His Website
http://www.willpearson.co.uk/virtual-tour/shard-360-dusk/

gives a virtual tour of London from the top of the building. You can move around the skyline using your mouse, tipping the view up and down. its a beautiful way to see the capital.

Tour South Korea in Street View

http://google-latlong.blogspot.in/2012/01/take-tour-of-south-korea-using-street.html
Link
South Korea's two biggest cities Seoul and Busan, are now available to see in street view.
There are loads of fantastic sights to see, including the view from Busan's Namhang Bridge
{ bit.ly/bridge285 } and Seoul's Gwangwamun Square { bit.ly/square285 }


Sunday, November 28, 2010

Default Windows 7 God Mode


One of the less known options on Windows 7 is the God Mode feature. Basically, it lets you have every setting and option right in front of you, ready to be used without having to browse among different settings before getting what you are looking for. Here is how to enable it:

Right click on any bank space on your desktop.

Click new from the menu and create a New Folder.

Rename the folder as follow: GodMode.{ED7BA470-8E54-465E-825C-99712043E01C}
DO NOT use this trick on Vista 64X. It will cause your Windows to crash! (read comments below)This simple command will create a special shortcut to the God Mode option letting you access all Windows 7 functions via a handy GUI!
EDIT:

GodMode also works on Windows Vista!

Wednesday, October 27, 2010

BackTrack Live USB Install

This method of getting a live install to a USB drive is the simplest available using Unetbootin. Note that we will format the USB drive and erase its contents.

  1. Plug in your USB Drive (Minimum USB Drive capacity 2 GB)
  2. Format the USB drive to FAT32
  3. Download Unetbootin from http://unetbootin.sourceforge.net/
  4. Start Unetbootin and select diskimage (use the backtrack-final ISO)
  5. Select your USB drive and click “OK” for creating a bootable BackTrack USB drive
  6. Log into BackTrack with the default username and password root / toor.
Source Info: http://www.backtrack-linux.org/tutorials/usb-live-install/

Thursday, October 21, 2010

Superb hacker puzzle - Try out... ! ! !

Try this Really Nice. I found the way…..

Just click on this link n use Ur common sense to navigate.

It has 23 pages one after the other, starting from this first page.

The trick is to find a way to go to the next page.

If u can really go to the 23rd page Ur a genius in Ur own respect

So best of luck n keep clicking, tick tick.....

http://www.freestuffhotdeals.com/hacker/1.html

Saturday, October 16, 2010

Monday, September 27, 2010

How to Connect Two Computers Together


How to Connect Two Computers Together

A home network is a basic and short-term network connection between two computers. It allows for communication between the two computers and also performs certain additional tasks. Home networks can either be wired or wireless. Home networks can be used to share the following:
  • Files and documents
  • Internet connection
  • Printers, scanners and other attached peripherals
  • Gaming systems
How to connect Two computers Together.
Home networks are of two types: wired and wireless. Wired networks are setup with the aid of Glossary Link Ethernet cable. Both computers must have Network Interface Cards ( Glossary Link NIC) installed on them. Users can transfer data quickly and securely with wired networks as compared to wireless networks. Wireless networks require both computers to have Wireless Network Interface Cards.
For setting up a wired home network between two computers, you will need Ethernet cable and make sure both the computers have network cards installed. If the computers do not have a built-in network card, you will need to plug network cards into one of the Glossary Link PCI slots present in the computers expansion area. To set up a wired network between two computers with Windows XP installed, perform the following steps:

  1. Take one end of the Ethernet cable and insert it into the Ethernet port of the first computer. You should hear a click when the Ethernet cable connector fits correctly.
  2. Take the other end of the Ethernet cable and insert it into the other computer’s Ethernet port.
  3. Turn on both computers. Windows XP should automatically recognize the other computer and you should be able to see the network connection Glossary Link icon flashing in the Glossary Link system tray. If this is not the case, proceed to step 4.
  4. Click Start and then click the menu option My Network places.
  5. The My Network places window appears.
  6. Click the option Set up a home or small office network located on the left pane of the screen.
  7. The Network Setup Wizard appears.
  8. Follow the onscreen instructions to setup the network between the two computers.
To setup a wireless home network or ad hoc network, you must have two or more personal computers or laptops with wireless network interface cards. To setup a wireless or an ad hoc connection on a home computer, perform the following steps:

  1. Click Start and then Glossary Link Control Panel.
  2. Double-click the Network Connections icon.
  3. Right-click your wireless network connection, and click Properties.
  4. The Wireless Network Connection Properties window appears. Click the Wireless Network tab.
  5. Click the Add button present under the Preferred networks section.
  6. The Wireless Network Properties window appears.
  7. Type a name for your network in the text field Network Name (SSID), present under the tab Association.
  8. Check both the The key is provided for me automatically and This is a computer-to-computer (ad hoc) network check boxes.
  9. Click Ok to save the made changes. The Ad hoc network is now set up.

Note: To ensure security for the ad hoc network, you can clear the The key is provided for me automatically check box and specify your own 13 digit password.

To connect another computer to the wireless network, perform the following steps:

  1. In the lower right hand corner of your desktop screen, right-click the Wireless Network icon and then click View Available Wireless Networks.
  2. The Wireless Network Connection window appears. It will display your newly created ad hoc network with the SSID name you specified. Highlight your connection on the list and then click Connect.
  3. Type your Glossary Link encryption key in both the Network key and the Confirm network key text boxes and click Connect, if you have chosen a password earlier.
  4. A progress bar will be displayed as the connection is established. Once the connection is through, you can exit the Wireless Network Connection window.


Thursday, July 15, 2010

Track your lost mobile


No need to go to police or mobile operator

If u lost your mobile,

Nowdays each one of us carry Mobile devices and always fear that it may be stolen.
Each mobile carries a unique IMEI i.e International Mobile Identity No which can be used to track your mobile anywhere in the world.
This is how it works!!!!!!
1. Dial *#06# from your mobile.
2. Your mobile shows a unique 15 digit .
3. Note down this no anywhere but except your mobile as this is the no which will help trace your mobile in case of a theft.
4. Once stolen you just have to mail this 15 digit IMEI no. to cop@vsnl.net
5. No need to go to police.
6. Your Mobile will be traced within next 24 hrs via a complex system of GPRS and internet.
7. You will find where your hand set is being operated even in case your no is being changed.

PASS ON THIS VERY IMP MESSAGE TO ALL YOUR FRIENDS AND RELATIVES.

If u lost your mobile, send an e-mail to cop@vsnl.netwith the following info.
Your name:
Address:
Phone model:
Make:
Last used No.:
E-mail for communication

:
Missed date:
IMEI No.:

Monday, June 28, 2010

Bypass Download Waiting Time On Rapidshare, Megaupload, zShare, Mediafire etc


SkipScreen is a really useful firefox addon for lot of users who download various types of files from the popular file and media sharing sites like Rapidshare, Megaupload, zShare, Mediafire, and more.

Most of these file sharing web sites have a annoying waiting time limit before a free user can start downloading the requested file. So, SkipScreen can be really useful in saving your time wasted seeing the download waiting time as it removes the screen of download waiting time from these media sharing sites.

SkipScreen monitors the pages where you see the download time and will get the content you want before the download waiting time completes.
Download SkipScreen

Sunday, April 18, 2010

Best Ethical Hacking & Security Blogs You Should Always Follow......

So I decided to get a great collection of some of the best security blog I have ever came across. Hope you like it as well.


Darknet.org.uk
- Don’t Learn to Hack , Hack to Learn
. Its their slogan & also giving out one of the well known truth that you can never learn hacking without getting into it. He writes about phishing, web hacking, general, wireless hacking, vulnerabilities & exploits. Its a good one to follow to know the latest exploits.

Insane Security
- Security Through Distorted Eyes, This guy, is keeping a close eye on security happening s & you must fllow him to get the latest news about hacking, more than that you would love the way he writes because he got the ingredient of fun within his hacking.

Roger’s Informative Security Blog
This blog is not just about security its also about security updates & technology. Within past few days he have written great articles regarding facebook & security updates. Its a good one two follow as a security news blog.

SecuriTeam Security Blog
Securiteam security blog is about coding, vulnerabilities, bus & exploits. They are also regularly posting the unique exploits & you should follow this blog if you are more interested into exploits & vulnerabilities (I am wondering, who is not ?)

Anarchia.tk – Computer Hacks & Security
I have missed this blog for long time, and wondered why I don’t got anything like that in my early hacking days. It is one of the best blogs for anarchists who wish to start their career as hacking. It includes various topics from computer tweaks to hardcore hacking. So Beginners, never miss this one please.

Tech Republic IT Security
Another great collection of ethical hacking & security news & articles, It is online from 4-5 years now, they are giving out some of the best news in IT perspective. There content is great to follow & also to become a strong minded ethical hacker. So this is it guys, I guess if you follow all this blog you can survive a lot much in security industry than others. Not just for survival but for learning & hacking , DO FOLLOW THESE TOP ETHICAL HACKING & SECURITY BLOGS – ALWAYS


Tuesday, March 2, 2010

backtrack-linux.org

" The quieter you become the more you able to hear...."

Welcome to backtrack-linux.org, the highest rated and acclaimed Linux security distribution to date. BackTrack is a Linux-based penetration testing arsenal that aids security professionals in the ability to perform assessments in a purely native environment dedicated to hacking. Regardless if you’re making BackTrack your primary operating system, booting from a LiveDVD, or using your favorite thumbdrive, BackTrack has been customized down to every package, kernel configuration, script and patch solely for the purpose of the penetration tester.

BackTrack is intended for all audiences from the most savvy security professionals to early newcomers to the information security field. BackTrack promotes a quick and easy way to find and update the largest database of security tool collection to-date.

Our community of users range from skilled penetration testers in the information security field, government entities, information technology, security enthusiasts, and individuals new to the security community. Feedback from all industries and skill levels allows us to truly develop a solution that is tailored towards everyone and far exceeds anything ever developed both commercially and freely available.

Whether you’re hacking wireless, exploiting servers, performing a web application assessment, learning, or social-engineering a client, BackTrack is the one-stop-shop for all of your security needs.


Saturday, February 13, 2010

ChickHEN Homebrew Enabler + Easy Installer


Requirements:


OFW PSP with 5.03
http://www.mediafire.com/?qmizmg3ozkh
Password: www.dotsis.com

5.03 ChickHEN Homebrew Enabler - Team Typhoon (Article by Granite) So comes the release of
the highly anticipated ChickHEN homebrew enabler by Team Typhoon. After 1800 Lines of code, 4 weeks
of stressful developing and countless amounts of tests the dawn of a new homebrew era for all the
3000, 2000 and 1000 users is on the horizon. What was said to be impossible by many is now a reality,
all styles homebrew are now running on the "unhackable" T88v3 and TA-090 motherboards rolled out by sony.

What does the ChickHEN do?
ChickHEN as a Homebrew Enabler that allows the execution of homebrew via the PSP XMB.
Running via a vulnerability in the lib TIFF the launcher takes advantage of the system
by performing a kernel exploit and rebooting into a homebrew enabled environment.
The ChickHEN remains active until the PSP is fully reset in which case official firmware
loads from the flash. ChickHEN unlike other HEN's doesn't touch the flash0 and resides
completely in memory. The h.bin supplied in this download consists of a loader and systemex,
which is a inversed order of systemctrl and rebootex

How do I get the HEN to run on my PSP?
1. First off use the supplied TIFF image and place it in the PSP>PHOTO Directory.

2. Copy h.bin over to the MS ROOT and safely remove device.

2. Scroll over to the PHOTO icon on the XMB and click the ChickHEN folder and wait.
(This will not work the first time, you may have to just use a method of loading that works
for you but this is what we have found most efficient)

3. If all goes well the screen should blank out and flash green showing that the HEN is loaded and all is well.

4. Wait for your PSP to reboot and check your PSP's system software. It should now display: "5.03 ChickHEN".

5. Scroll on over to GAME and enjoy some Homebrew!

[Can it brick my PSP?]

ChickHEN works differently to all previous HEN's. Instead of flashing to flash0, it resides entirely in RAM
to prevent any damage to the system. Sure enough, you can run applications in HEN to flash stuff but I strongly
recommend against it. ChickHEN comes with no warranty, no guarantee and you run this software under your own
responsibility. Flashing onto your PSP WILL BRICK IT!!
As stated, HEN comes with no warrenty, and this software should not be used in conjunction with
homebrew which can countervent any copyright laws.

Credits:
Team Typhoon: ChickHEN
MaTiAz: TIFF Eggsploit
Lawrence Jackson (LCJ14) – PSP 3000
MforMature staff: For everything

Everyone else who gave help during the development
5.03 ChickHEN R2
[Changelog]
- Now supports homebrew
- Homebrew Support enhanced
- Tiff image blocking in HEN (displays unsupported)


5.03 ChickHEN R2


What does the ChickHEN do?

ChickHEN as a Homebrew Enabler that allows the execution of homebrew via the PSP XMB.
Running via a vulnerability in the lib TIFF the launcher takes advantage of the system
by performing a kernel exploit and rebooting into a homebrew enabled environment.
The ChickHEN remains active until the PSP is fully reset in which case official firmware
loads from the flash. ChickHEN unlike other HEN's doesn't touch the flash0 and resides
completely in memory. The h.bin supplied in this download consists of a loader and systemex,
which is a inversed order of systemctrl and rebootex


Download here:
http://www.mediafire.com/?thzmlwjyz44


5.03 ChickHEN R2

How to install ChickHEN?

1. copy h.bin to the root of the memory stick


2. then copy ChickHEN folder inside PSP\PHOTO


3. Scroll over to the PHOTO icon on the XMB and click the ChickHEN folder and wait.

4A. if done correctly you will see a color green on your screen then the psp will reboot.

4B. if the PSP hangs then shutdown just repeat # 3.

Download here:
http://www.mediafire.com/?thzmlwjyz44

Sunday, November 8, 2009

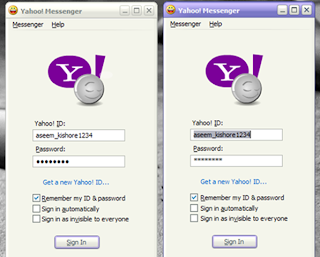
Multiple login in yahoo Without Using any Software


Multiple login in yahoo Without Using any Software


You can login with multiple id's on the same yahoo messenger without any download or patch .

Follow these steps :

1. Go to Start ----> Run . Type regedit, then enter .

2.Navigate to HKEY_CURRENT_USER --------> Software --->yahoo ----->pager---->Test

3.On the right page , right-click and choose new Dword value .

4.Rename it as Plural.

5.Double click and assign a decimal value of 1.

Its done!!
Now close registry and restart yahoo messenger and try Multiple Login

Powered by FEROZ Need Comments Guys...

Saturday, October 31, 2009

How to turn the PC on in 10 seconds ?

How to turn the PC on in 10 seconds ?

So you want to know “How to turn the PC on in 10 seconds”. Alright here is what you have to do to turn on your PC in 10 seconds

  • First click on the start button then press R it will take you to Run well go to run.
  • Then type Regedit.
  • Press Enter.
  • This will open Registery Editor.
  • Now look for the key.

HKEY_LOCAL_MACHINE\SYSTEM\CurrentControlSet\Control\ContentIndex

  • Now there find the Key Called “Startup Delay”
  • Double Click On It.
  • Now where its Base.
  • Click Decimal.
  • Now its Default Value Is 4800000.
  • Change The Value To 40000.
  • Here you go. You have Done it
  • Now close the Registery Editor and Restart Your Computer.
  • You’ll See The Result.

Comments Appreciated

Thursday, August 27, 2009

Some Useful Google SMS Channels


Some Useful Google SMS Channels
the following are some useful google SMS channels..Receive SMS's everyday...this service is absolutely FREE.

So, Subscribe NOW!!
*NEW* Link to subscribe to Movie_Ratings~

Receive the ratings and reviews of the latest tollywood, bollywood and hollywood movies on your mobile every Friday!

http://labs.google.co.in/smschannels.../Movie_Ratings


*NEW* Link to subscribe to vocab_builder~

Receive A WORD A DAY on your mobile..useful channel for CAT,GRE,TOEFL Aspirants!

Increase your vocabulary get handpicked unique never heard word of the day and its meaning for free. For your communication skills your vocabulary must be strong

http://labs.google.co.in/smschannels.../Vocab_Builder


link to subscribe to Funny ONELINERS,JOKES,QUOTES~

Receive Jokes, Oneliners, Quotes everyday on ur mobile!!


http://labs.google.co.in/smschannels...nny_One_Liners


ADULT JOKES (+18 jokes & Oneliners)~

Receive non-veg adult jokes everyday for FREE on ur mobile. No ads,no spam. Only Jokes!!!


http://labs.google.co.in/smschannels...ibe/adultjokez


Cricket Live Scoreboard
~

to receive score alerts on ur mobile

http://labs.google.co.in/smschannels...LIVESCOREBOARD


Ibnlive Top News~


Get Top Headlines of CNN IBN instantly on your mobile.

http://labs.google.co.in/smschannels...BNLIVE_TopNews


JNTU Updates~

U will get an SMS alert when ur EXAM RESULTS are announced. u will get JNTU related info, alerts when a notification is issued by JNTU,or any other univ.

http://labs.google.co.in/smschannels/channel/JNTU-UPDATES

Monday, August 10, 2009

Setting Up A Hackers Workstation


Setting Up A Hackers Workstation

you’re now ready to take on the hacking stuff. At very beginning you have to make your workstation ready, so that things will be available to you at one click.

You have to collect some of the tools, Operating System & documentation on your PC with a very clear format.


Operating System:

Which OS to use, choice is all yours. Windows in all cases is not so ‘made for hacking’ according to me. Whatever XP,Vista or windows 7. They are all just OS which are made for novice public which can learn computers.

If you are a regular Linux user, Then shift to Backtrack Linux. It is Linux made for hacker geeks & completely embedded with all penetration testing tools in it. You can Download Backtrack here. But if you have never used Linux & wish to learn then you can use basic Linux distributions like Ubuntu. But remember that you or not supposed to learn Linux desktop environment like windows, you have to learn its shell or terminal. (command prompt of Linux)

As I said Choice is all yours you can go with Windows also. Its all on you. (Suggestion: If you can’t make it habit to learn new things, you can never be a HACKER)

Hackers Toolkit:

In your root directory or C:/ in windows make a folder named Tools. So that you can access all tools from command prompt easily E.g. c:/tools/example

Go surf for these tools enlisted.


What are these tools ? Why are they used for ? How to use it ? are some of the questions that are striking your head. Chill all dudes & babes, I am here to help you with each of the tools listed above. All you have to do is first download them all & place in your root directory.

And yes, don’t worry about such big list, you won’t need to use all at a time, they are have wide uses in different fields like – Cracking, Wireless Networks hacking, Password Hacking, Encryption, Sniffing, Scanning & Enumeration, SQL injection & Web Hacking etc.

So have the tools, and go through their home pages & read as more as you can. For any sort of problems you have, I am just a comment away from you.

Friday, August 7, 2009

Here is the Best way to Crack the BIOS password


Here is the Best way to Crack the BIOS password


There are a lot ways to Crack the BIOS password. This is one of them but I would say that this one is more effective than the rest because the rest of the ways does not Guarantee you that it will Crack the BIOS password while in this case the Cracking is Guaranteed since in this we will remove the functionality of password protection of the BIOS.

Follow the steps below:

[eminimall]

1) Boot up windows.
2) go to dos-prompt or go to command prompt directly from the windows start up menu.

3) type the command at the prompt: “debug” (without quotes ninja.gif )
4) type the following lines now exactly as given…….
o 70 10
o 71 20
quit
exit

4) exit from the dos prompt and restart the machine

password protection gone!!!!!!!!!!!!!

EnjoYYYYYYYYYY

PS: I tested this in Award Bios……..
There seems to be some issue regarding display drivers on some machines if this is used. Just reinstall the drivers, Everything will be fine………..

I have not found any other trouble if the codes are used.

To be on safe side, just back up your data……….

The use of this code is entirely at ur risk……….

It worked fine for me……….

Tuesday, July 28, 2009

How to Hack into a Security Camera


How to Hack into a Security Camera

This is really interesting article. Well this is not really hacking. All what we are looking at are unsecured cams from around the world that are interfaced with the internet. So how do you find such cams. Just google these strings and select the results.What to do next need not have an explaination.

Open this Site : www.google.com Type These Code's in Google Search Bar. Example : inurl:”CgiStart?page=” Give only this CgiStart?page= code in Google Search Bar.


  • inurl:”CgiStart?page=”
  • inurl:/view.shtml
  • intitle:”Live View / – AXIS
  • inurl:view/view.shtml
  • inurl:ViewerFrame?Mode=
  • inurl:ViewerFrame?Mode=Refresh
  • inurl:axis-cgi/jpg
  • inurl:axis-cgi/mjpg (motion-JPEG) (disconnected)
  • inurl:view/indexFrame.shtml
  • inurl:view/index.shtml
  • inurl:view/view.shtml
  • liveapplet
  • intitle:”live view” intitle:axis
  • intitle:liveapplet
  • allintitle:”Network Camera NetworkCamera” (disconnected)
  • intitle:axis intitle:”video server”
  • intitle:liveapplet inurl:LvAppl
  • intitle:”EvoCam” inurl:”webcam.html”
  • intitle:”Live NetSnap Cam-Server feed”
  • intitle:”Live View / – AXIS”
  • intitle:”Live View / – AXIS 206M”
  • intitle:”Live View / – AXIS 206W”
  • intitle:”Live View / – AXIS 210″
  • inurl:indexFrame.shtml Axis
  • inurl:”MultiCameraFrame?Mode=Motion” (disconnected)
  • intitle:start inurl:cgistart
  • intitle:”WJ-NT104 Main Page”
  • intitle:snc-z20 inurl:home/
  • intitle:snc-cs3 inurl:home/
  • intitle:snc-rz30 inurl:home/
  • intitle:”sony network camera snc-p1″
  • intitle:”sony network camera snc-m1″
  • site:.viewnetcam.com -www.viewnetcam.com
  • intitle:”Toshiba Network Camera” user login
  • intitle:”netcam live image” (disconnected)
  • intitle:”i-Catcher Console – Web Monitor”

So happy spying.

Popularity: 1% [?]

Saturday, June 20, 2009

Ethical Hacking 4.0

SITES :

http://hungry-hackers.com/
http://www.darknet.org.uk/
http://www.gohacking.com/
http://www.hackedinfo.com
http://www.gohacking.com/ warning warning
http://freesoftinn.blogspot.com/
http://systadmin.blogspot.com
http://xhackerprakashjanawade.wetpaint.com/page/RapidShare+HACKING

Carry your system with you on a USB drive

Download Link :
http://mojopac.en.softonic.com/

“Take your applications, settings and data with you to any PC”


MojoPac is a technology that transforms your iPod or other USB storage device into a portable and private PC. Just install MojoPac on any device with a USB port, upload your applications and files, modify your user settings and environment preferences, and take it with you everywhere.

Every time you plug your MojoPac-enabled device into any Windows XP PC, MojoPac automatically launches your environment on the host PC. Your communications, music, games, applications, and files are all local and accessible. And when you unplug the MojoPac device, no trace is left behind – your information is not cached on the host PC.

Privacy

With MojoPac, your personal information is never left behind. When you unplug your MojoPac device from any host PC, all browsing history, Multimedia Player history, applications history, files and personal settings are removed along with it. Additionally, all the sensitive information that you want to protect, such as financial applications or your private communications, can be installed on your MojoPac device, keeping them off of your PC and inaccessible to anyone.

Portability

MojoPac can be installed on your iPod, USB flash drive, or any other device with a USB drive like your USB-enabled mobile phone. There’s no need to lug your laptop along. MojoPac allows you to take all your communications, music, games, applications, and files with you, on a device that fits in your pocket!

Compatible devices:

  • iPods
  • USB Hard Drives
  • USB Flash Drives
  • Cell Phones

Languages:

English

Recent changes in MojoPac:

  • Interface improvements and big fixes

Limitations:

30 day Trial Period

OS requirements for MojoPac:

  • OS: Windows XP

Minimum requirements:

Wednesday, June 3, 2009

Password For a MS word Document.

Password for a MS word document

You can protect your document by applying password so that unauthorized person can not display as well as modify your document. You can apply two types of passwords:

Password to open the document:

If it is applied then you have to give the correct password to open the document, otherwise you cannot open the document.

Password to modify the document:

If it is applied then you have to give the correct password to modify the document, otherwise your document is opened but you cannot modify the document. It means that your document becomes read-only.

To apply a password to document, follow these steps.

* Open Save As dialog box by selecting "Save As" command from File menu.

* Click "Tools" button of Save As dialog box and choose "General Options" from drop down menu, "Save" dialog box appears as shown in figure below.

* Enter first password in "Password to open" text box and second password in "Password to modify" text box (if required) and click "Ok" button of dialog box. Microsoft Word will open "Confirm Password" dialog box for the confirmation of passwords. The maximum length of password is 15 characters.

* Re-enter the password to open and password to modify and click "Ok" button of Confirm Password dialog boxes one by one.

* Click "Save" button of Save As dialog box.


Here's how you crack the password protected Microsoft Word file:

First, open the document and do a "Save As..." specifying Rich Text Format (RTF). It'll end up being called something.rtf.

Now open the RTF file by double-clicking on it. It should look identical to the original Word file.

Final step: save the RTF file with a new name as a Microsoft Word format document.

Go To This Site.
http://www.rixler.com/word_password_recovery.htm

File Extension List

The file extension list you requested is shown on this page.These lists contain basic information: the extension, the name of the program it works with, the specific function of the file, and the company that makes the program.

Please honor the copyright on this list. Do not copy it and display it elsewhere. Thank you.
Sound :

MPEG-1/2 Audio Layer 3 (.mp3)
Ogg Vorbis (.ogg)
ASF Audio (.asf,.wma)
Wave form audio format (.wav)
RealAudio (.ra,.rm)
Free Lossless Audio codec(.flac)
Advanced Audio coding (.aac)
MPEG-4 advanced audio coding (.m4a,.mp4)
Musepack (.mpc)
TwinVQ(.vqf)
3GP Music (.3gp)
AC3 Audio File (.ac3)
Adaptive Multi-Rate (.amr)
Adaptive Multi-Rate WB (.awb)
Sun Mircrosystem's audio format (.au,.snd)
Audio Interchange File Format (.aiff)
Purevoice File (.qcp)
AMIGA 8bit sound file (.8svx)
PSION sound file (.prc)
IRCAM sound file (.sf)
soundTool (.sndt)
PSION 8bit sound file (.wve)
soundtracker module (.mod)
FastTracker II module (.xm)
ImpulseTracker module (.it)
ScreamTracker module (.s3m)


Ringtone (Monophonic/Polyphonic) :

MIDI-0 (.mid,.midi)
SP-MIDI (.mid,.midi)
Midi Karaoke (.kar)
MMF/SMAF-1 (.mmf,.smaf)
Qualcomm CMX 3.0 (.pmd)
Motorola Ringtone (.mot)
Sagem Ringtone (.sagem)
Sagem Ringtone (.sagem21)
Ericsson emelody (.emy)
iMelody Ringtone Format (.imv)
Ringtones text transfer language (.rttl,.rtx)
Nokia phone Ring Tone (.nokia,.ott)
Nokia Phone Ring Tone (.noktxt)


Image :

Joint photographic experts group (.jfif,.jif,.jpe,.jpeg,.jpg)
Windows bitmap (.bmp)
Graphics interchange format (.gif)
Truevision TGA (.tga)
Portable network graphics (.pgm)
AVS X image (.avs)
Kodak Cineon Image Format (.cin)
ZSoft IBM PC multi-page paintbrush (.dcx)
Windows device independent bitmap (.dib)
SMPTE digital moving picture exchange (.dpx)
Microsoft icon (.ico)
Magick image file format (.miff)
On-the-air-Bitmap (.otb)
Palm pixmap (.palm)
Portable bitmap format black/white (.pbm)
Xv's Visual Schnauzer thumbnail (.p7)
Photo CD (.pcd)
Zsoft IBM PC Paintbrush file (.pcx)
Apple Mcintosh QuickDraw (.pict)
Portable Pixmap format - color (.ppm)
Adobe Photoshop bitmap file (.psd)
Photo CD - sRGB color (.pcds)
Irix RGB image (.sgi)
SUN Raster Image (.ras,.sun)
X Windows system bitmap black/white (.xbm)
X Windows system pixmap (.xpm)
CCIR 601 4:1:1 (.yuv)


Vector Document :

Windows Metafile (.wmf)
Scalable Vector Graphics (.svg)
Magick Vector Graphics (.mvg)
AutoCAD Interchange Format (.dxf)
Enhanced Metafile (.emf)
Encapsulated Postscript (.eps)
Computer Graphics Metafile (.cgm)
OS/w Metafile (.met)
OpenOffice 2.0 Draw Document (.odg)
OpenOffice 2.0 Draw Template (.otg)
OpenOffice 1.0 Draw Document (.sxd)
OpenOffice 1.0 Draw Template (.std)


Document :

Text files (.txt)
Url address (web) (.url)
HyperTextMarkup Language (.htm,.html)
XHTML (.xhtml)
Rich Text Format/MS Word (.rtf)
Portable Document Format (.pdf)
Adobe Postscript (.ps)
Microsoft Word (.doc)
MS Word template (.dot)
OpenOffice 2.0 Text Document (.odt)
OpenOffice 2.0 Text Template (.ott)
OpenOffice 1.0 Text Document (.sxw)
OpenOffice 1.0 Text Template (.stw)
AportisDoc Palm DB (.pdb)
Starwriter vorlage/Template (.vor)
PocketWord (.psw)
Wordperfect 6 (.wpd)
MS Word 2003 XML (.xml)

Data :


Data Interchange Format (.dif)
dBASE (.dbf)
Microsoft Excel (.xls)
MS Excel Vorlage/Template (.xlt)
Pocket Excel (.pxl)
SYLK (.slk)
Lotus 1-2-3 (.123,.wk1)
StarCalc (.sdc)
StarCalc Template (.vor)
OpenOffice 2.0 Spreadsheet (.ods)
OpenOffice 2.0 Calc template (.ots)
OpenOffice 1.0 spreadsheet (.sxc)
OpenOffice 1.0 calc template (.stc)


Mathematics :

MathML (.mml)
StarMath (.smf)
OpenOffice 2.0 Math (.odf)
OpenOffice 1.0 Math (.sxm)

Presentation :


Microsoft Powerpoint (.ppt)
Microsoft Powerpoint Template (.pot)
StarImpress 5.0 (.sdd)
StarImpress 5.0 Template (.vor)
StarImpress 4.0 (.sdd)
StarImpress 4.0 Template (.vor)
OpenOffice 2.0 Impress (.odp)
OpenOffice 2.0 Impress Template (.otp)
OpenOffice 1.0 Impress (.sxi)
OpenOffice 1.0 Impress Template (.sti)


Compressed archives:

Data compression (.zip)
7Z Archive (.7z)
LHA Archive (.lha,.lzh)
Roshal ArchiveArchive (.rar)
Tape ARchive (.tar)
TAR Gzip Compressed archive (.gz)
BZ2 compressed archive (.bza)
Deepfreezer YZ1 archive (.yz1)

Movie:

Windows Media Video (.wmv)
3GP/3G2 Video (.3gp)
Audio Video Interleave (.avi)
Matroska (.mkv)
Apple Quicktime (.mov)
Motion Picture Expert Group (.pg)
Ogg vorbis Compressed video (.ogm)
MPEG-4 (.mp4)
Flash Video (.flv)
DVD Video Object (.vob)
FLIC Animation (.fli)
Digital Video (.dv)
ASF Video (.asf)
Google Video File (.gvi)

If you need More Mail me......Thanks.